After Effects to CSS

Making the transition from animating in After Effects to CSS.
I started my dive into software design a couple years ago by creating demo videos and animating user interfaces. Coming from a Motion Design background, After Effects was my baby, and I had spent many years perfecting that craft. I have worked side by side with developers recreating the animations that I had created in After Effects. This process was slow and tedious - there was a need for the designer and developer to sit next to each other and hash out the details.
I wanted to improve this workflow, so I dove into the research to understand how animations work within development and what the mental model was in which I needed to adapt to. After Effects was my baby but I needed to let it go and understand the new tools at my disposal. Here are some of the key findings I found that an After Effects motion designer needs to understand if their animations will ultimately be in code.
1. Understand the Limitations
The world of development is constantly changing. As an animator, one needs to be up to date on the current web standards and restrictions for animations.
Understand the Properties at your disposal.
Basic List of Animatable Properties:
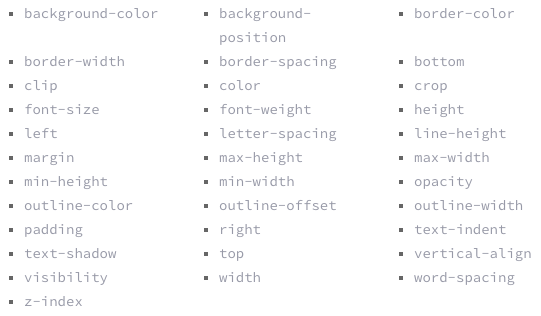
Examples of Each Property Animated
Consider Performance.
In After Effects you have to consider the render time of your animations. The same must be done for code; the performance of an animation must be considered.
Properties that are performat:
- Position
- Scale
- Rotation
- Opacity
Here is a great article by Paul Lewis and Paul Irish about High Performance Animations.
Push the limits:
Explore and see what other cool things are possible with animations! One of my biggest finds was SVG Animations.
Things you can do with SVG animation:
- Animate on Path
- Trim Stroke
- Change Stroke Weight
- Color
- SVG Filters
Here is a guide CSS-Tricks created for SVG Animations!
2. Understand CSS Keyframe Animation Structure
First define the keyframes for the animation:
@keyframes animation-rocks {
  0% {
    font-size: 10px;
  }
  30% {
    font-size: 15px;
  }
  100% {
    font-size: 12px;
  }
}
Then apply those keyframes to the object(s). Here, additional animation properties can be defined. For example: duration, iteration, delay, etc.
.object-class {
 animation-name: animation-rocks;
 animation-duration: 4s;
 animation-iteration-count: 10;
 animation-direction: alternate;
 animation-timing-function: ease-out;
 animation-fill-mode: forwards;
 animation-delay: 2s;
}
For more information about the CSS Keyframe animation structure check out W3School’s CSS3 Animations
3. Thinking in Percentages vs. Frames
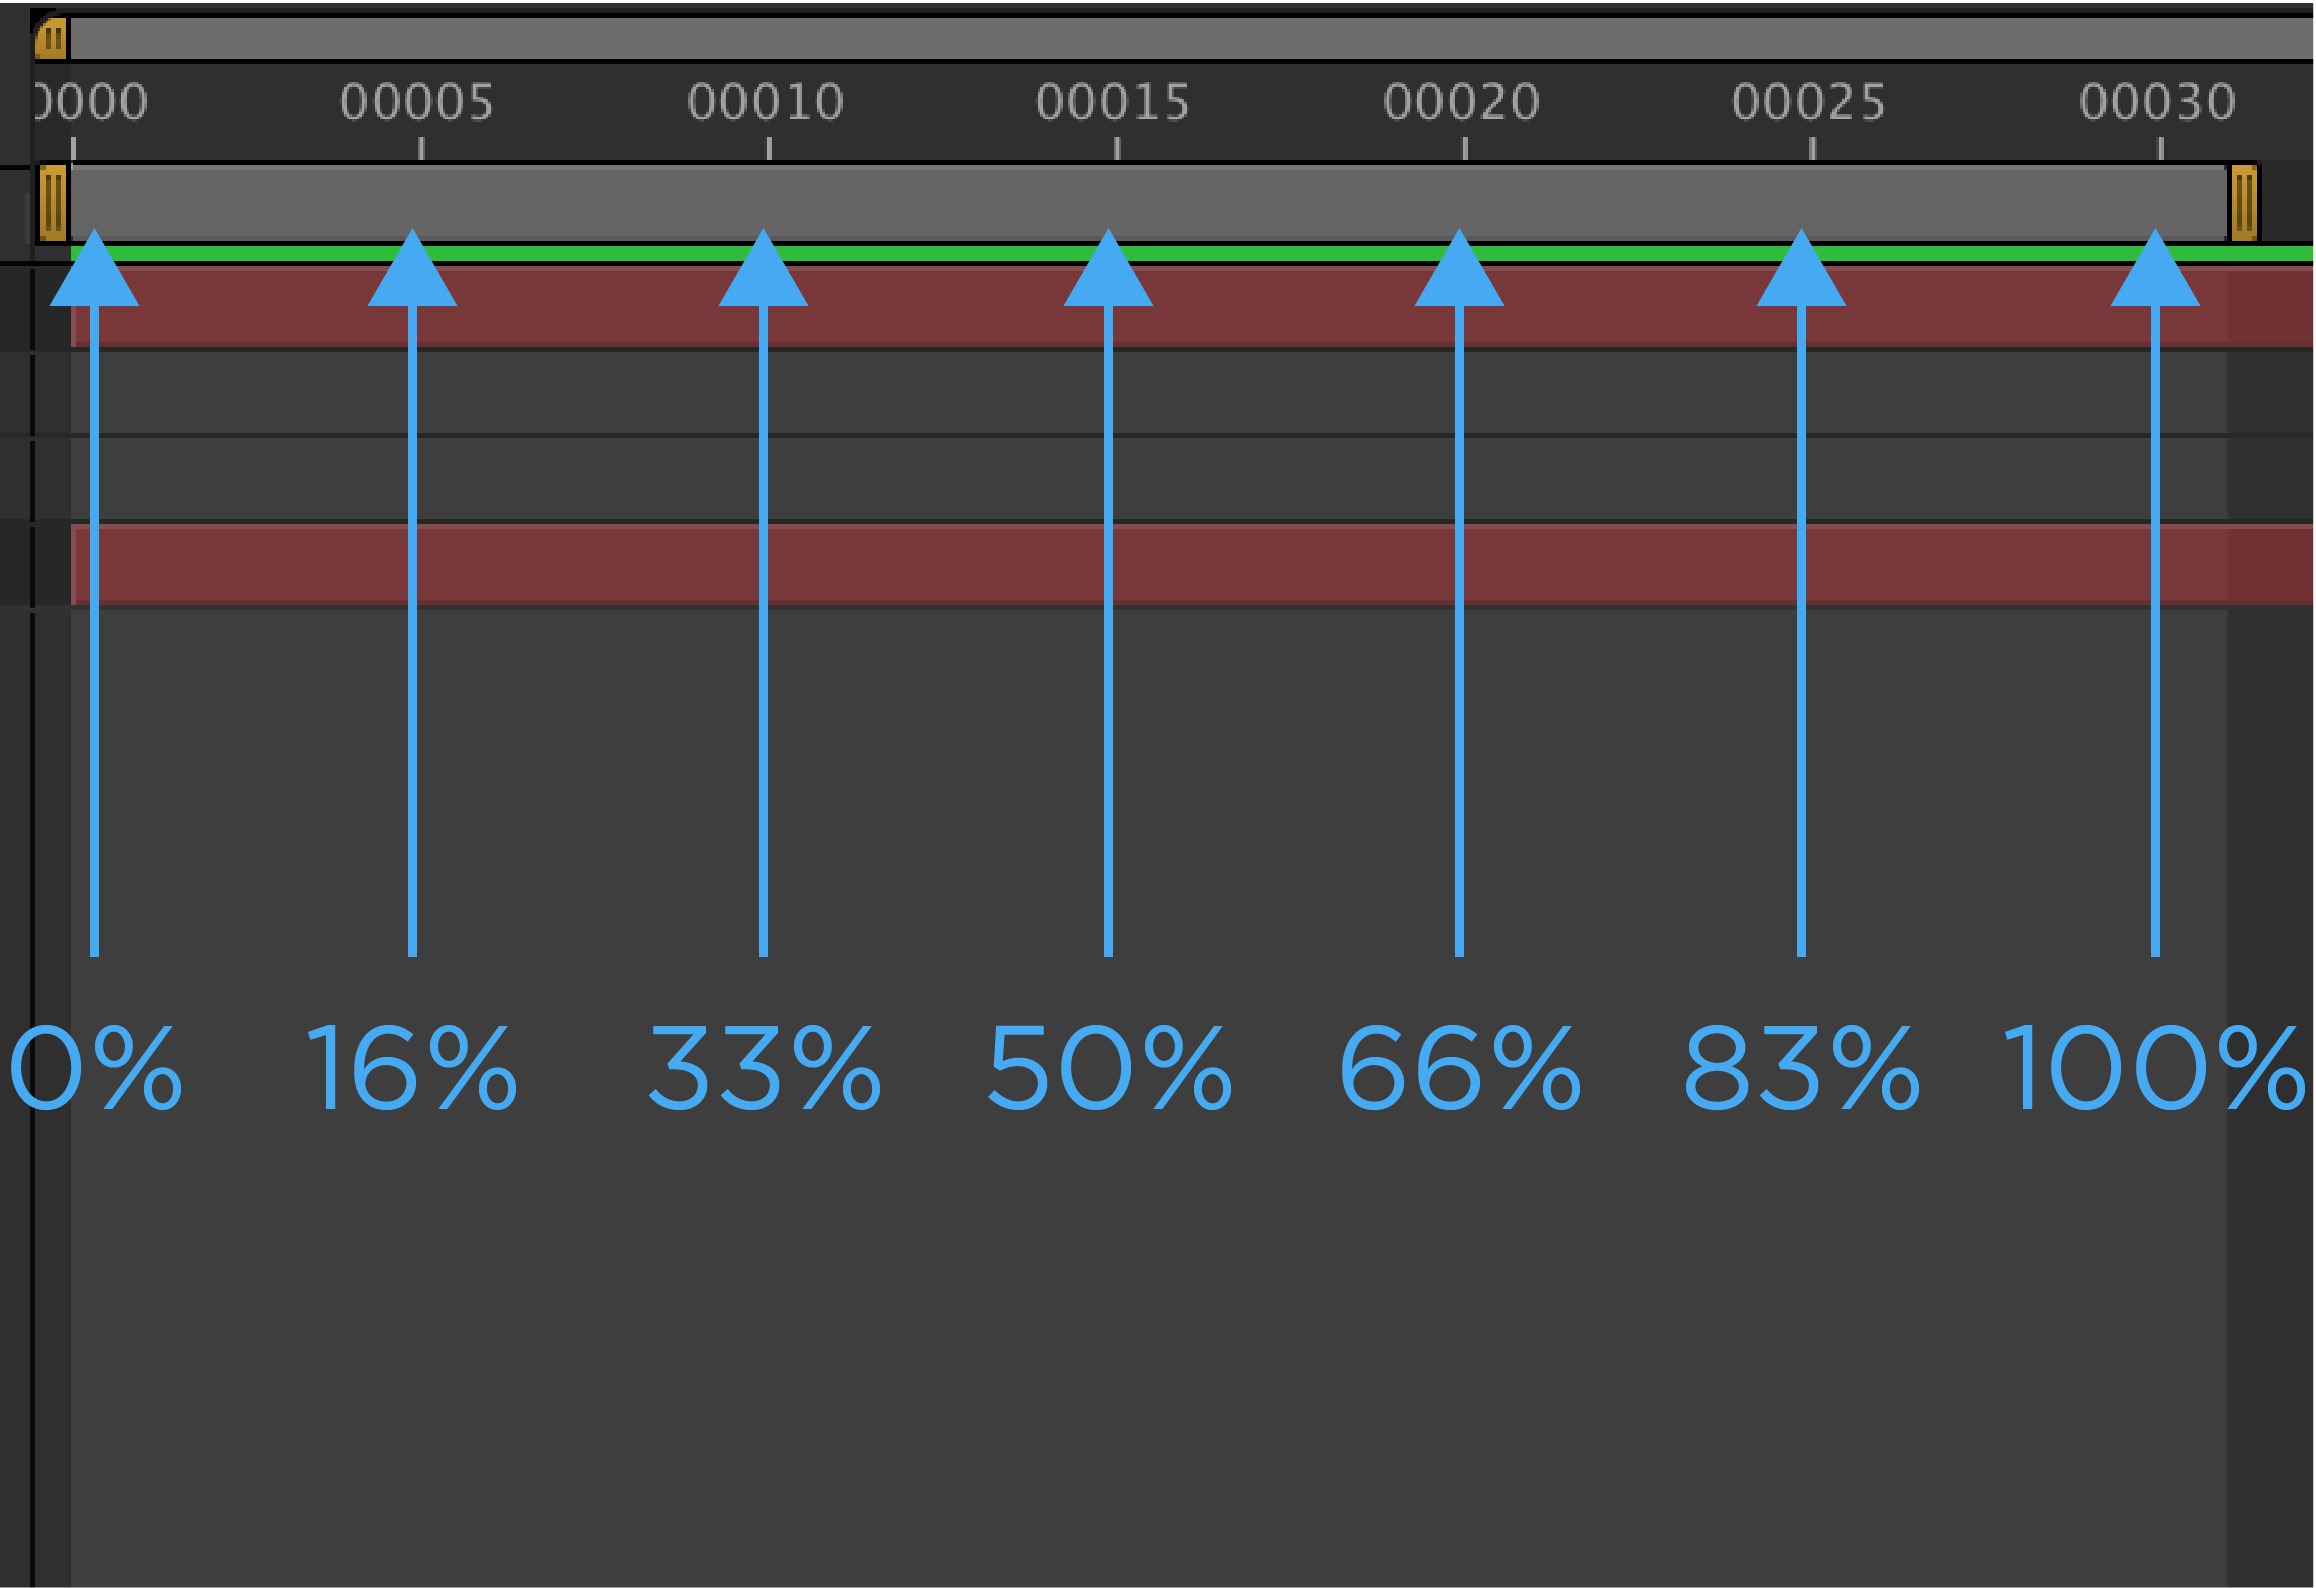
Animations are thought of as a 0% - 100% in the world of development vs. seconds/frames in After Effects. As an animator you need to be able to calculate where keyframes are located within a percentage vs. the frame/timecode its on.
The best way to prepare for this calculation in After Effects is to animate with a timeline that ends with a multiple of 5 (Ex: 30 frames or 1 second) - this makes it easier to translate your animation into code. It is also helpful to align multiple animation properties to the same percentage in the timeline. Below is an example of percentages mapped out to an After Effects timeline.
4. Understanding The Motion Curves of Timing-Functions
Understanding Timing-Functions was the tickiest part for me to wrap my mind around. Within CSS & many other programing languages there are predefined easing curves. The standard easeIn, easeOut, easeOutBounce, etc.
There are two different ways to apply eases in code:
In CSS there is the “global” ease that can be defined in the object class, this applies the same ease to every keyframe. For example, if you have a bounce, the animation will bounce at every keyframe.
.object-class {
 animation-name: animation-rocks;
 animation-timing-function: easeOutBounce;
}
The other way to define eases is within each keyframe.
@keyframes ae-to-css {
  0% {
    animation-timing-function:ease-out;
  }
  23% {
    animation-timing-function:ease-in;
  }
  50% {
    animation-timing-function:cubic-bezier(.5,0,.5,1.5);
  }
  76% {
    animation-timing-function:cubic-bezier(0,0,0,1);
  }
  100% {
  }
}
As an advanced animator, we never want to settle for a standard easy-ease - we like to get fancy and smooth with our easing curves. An average graph editor in After Effects looks like this:

So how do we recreate these beautiful motion curves in code? This is where the power of the cubic-bezier() comes in.
The cubic-bezier() function can be manipulated however you want - just like the After Effects graph editor. The only difference is the X&Y axies.
After Effects is Property over Time. The CSS cubic-bezier() is Percent of Animation over Time.
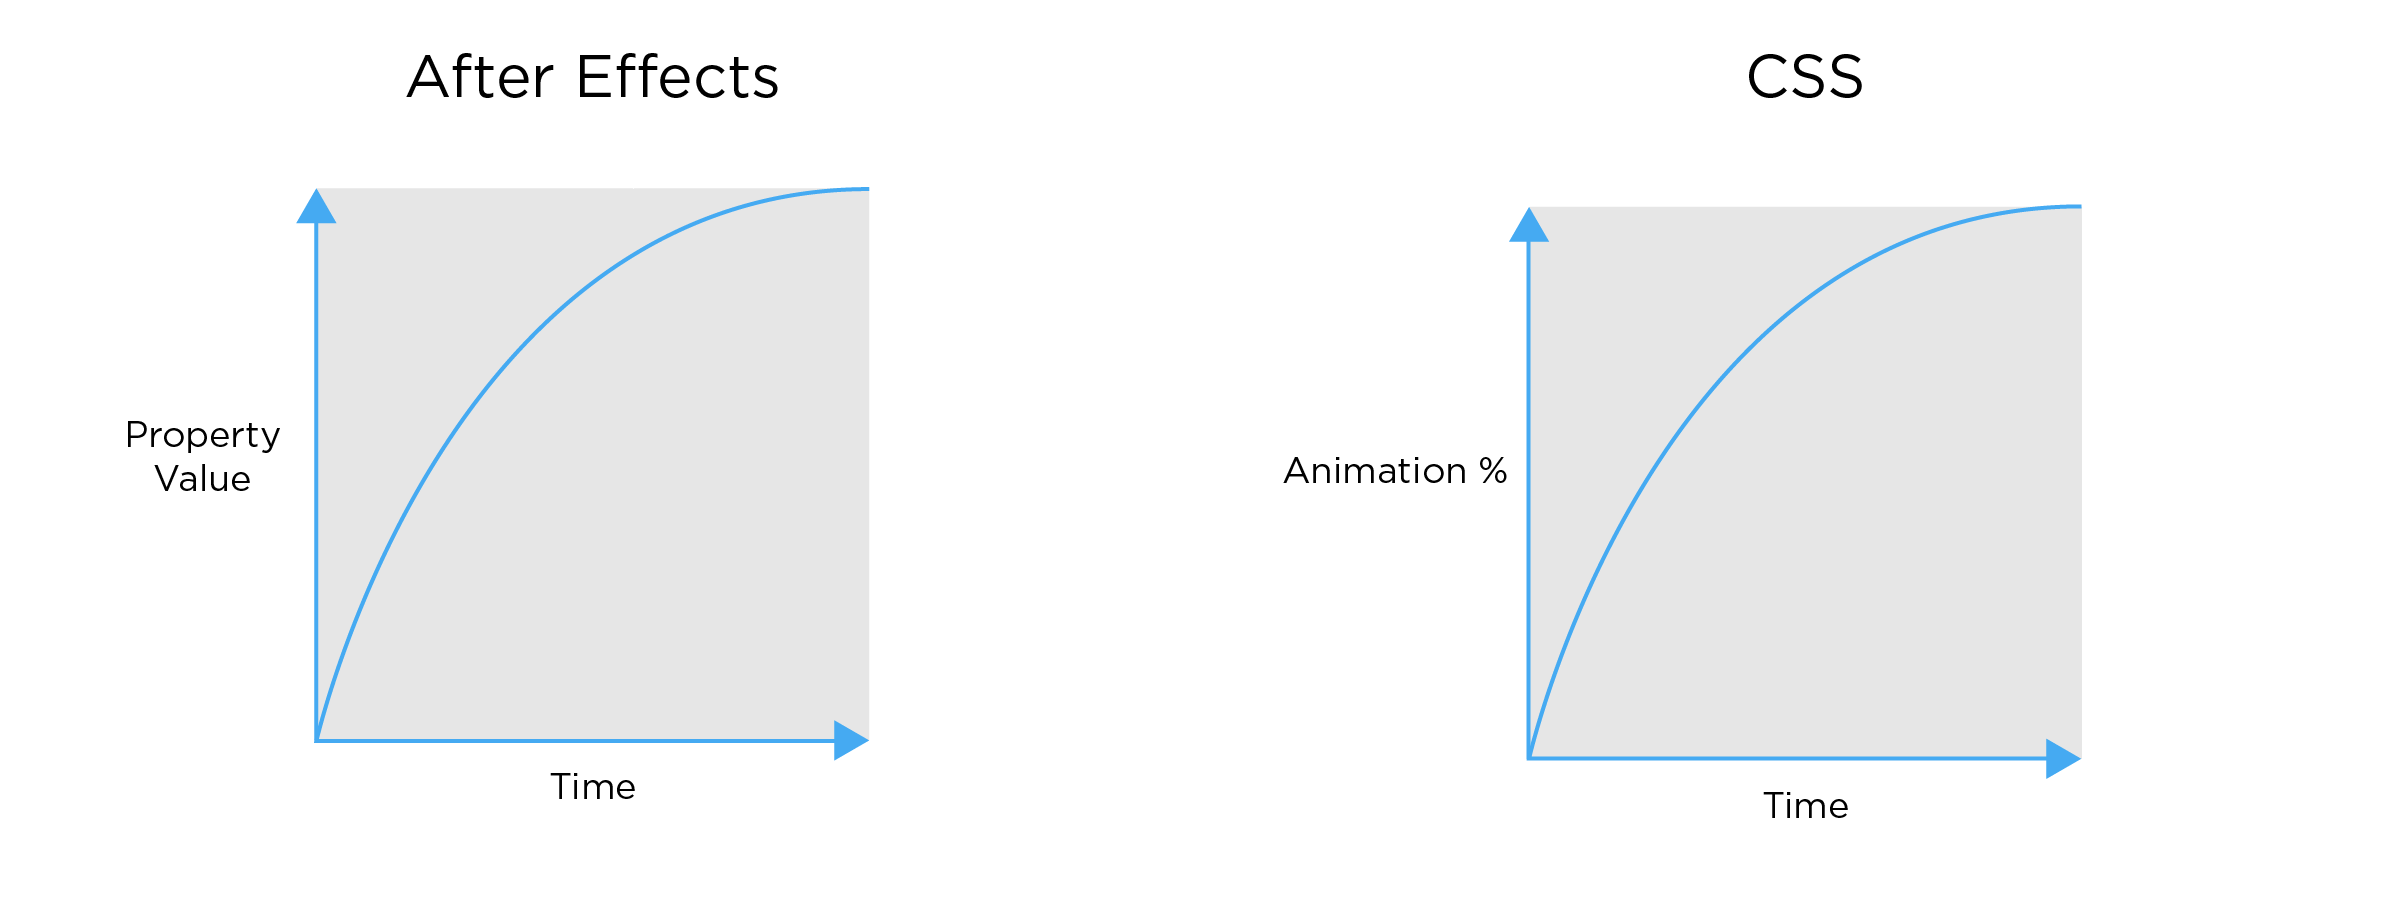
Adapting to this mental model took some time. See visual examples below of how After Effects curves translate to code.
After Effects
 CSS
CSS
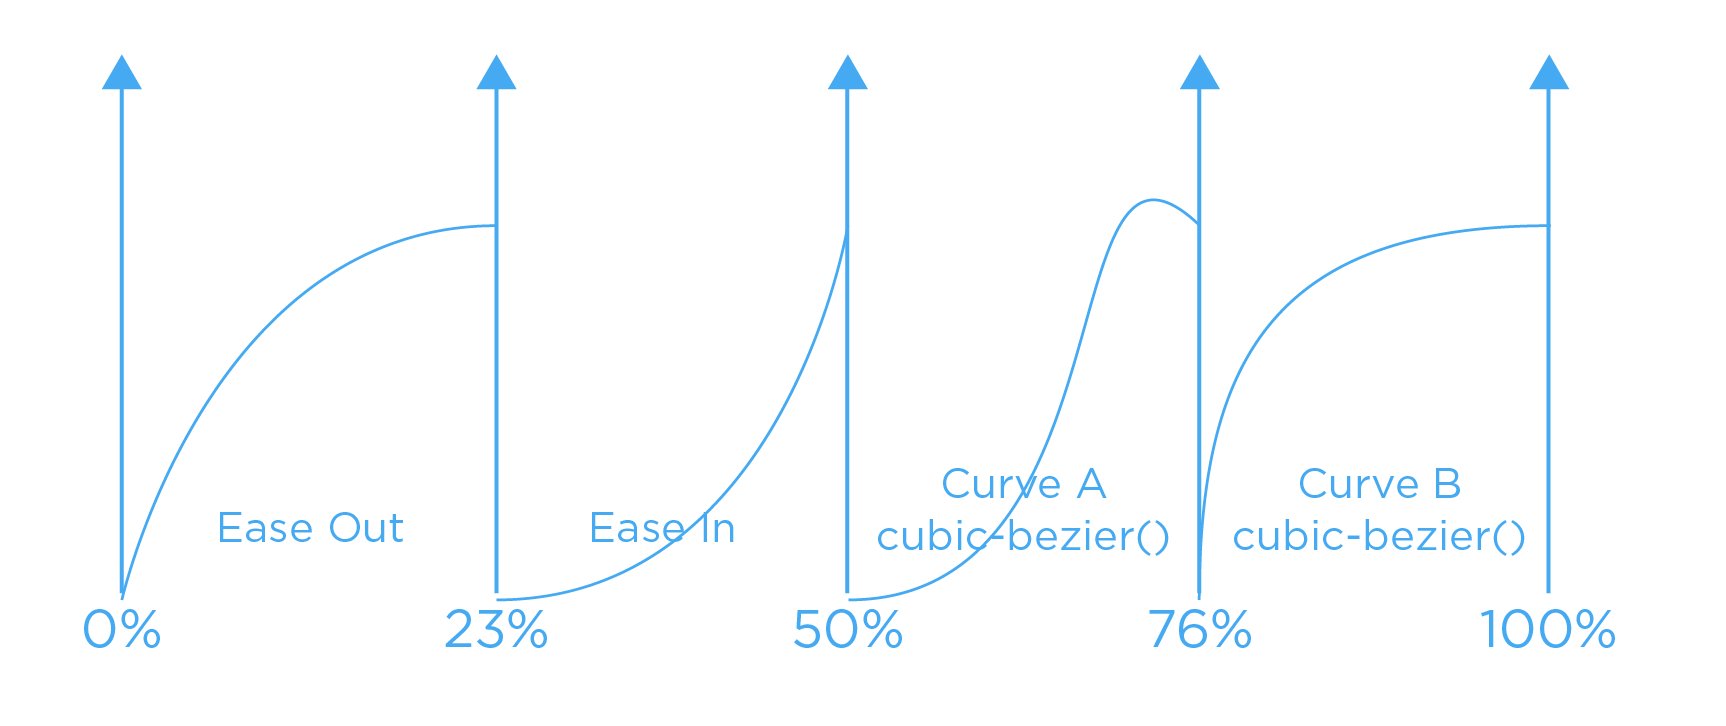
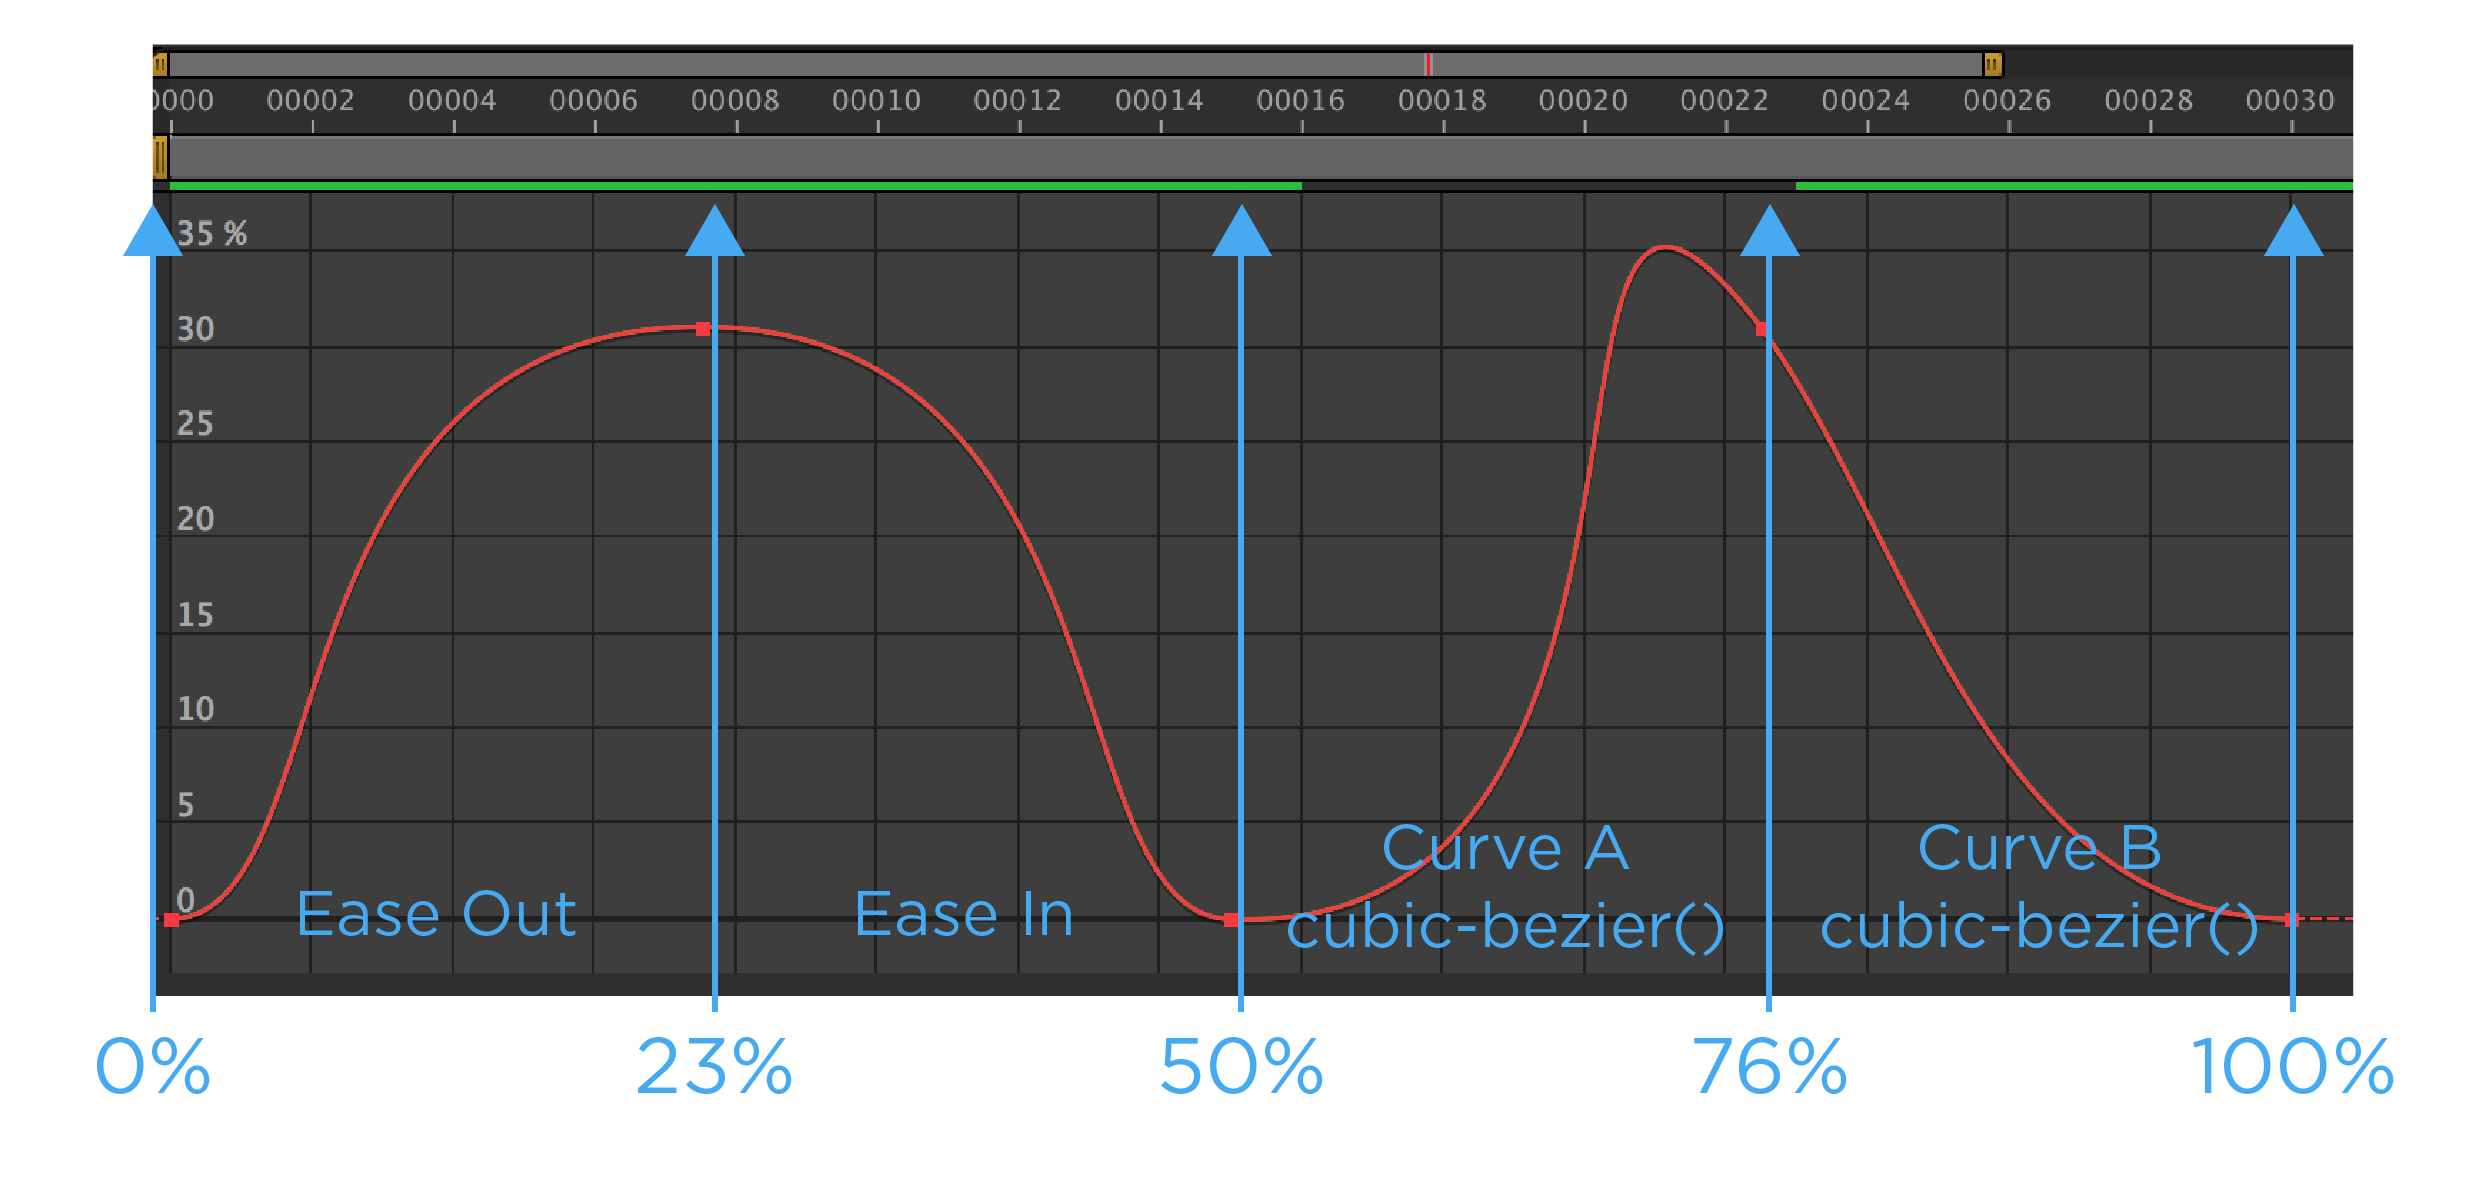
Below shows how the timeline above would look in CSS. Curve A & B are custom cubic-bezier() created with tools like Ceasar or Cubic-Bezier.com. Its important to take note that the easing curve is defined in the percentage value before you want the ease to happen.
@keyframes ae-to-css {
  0% {
    animation-timing-function:ease-out;
  }
  23% {
    animation-timing-function:ease-in;
  }
  50% {
    animation-timing-function:cubic-bezier(.5,0,.5,1.5);
  }
  76% {
    animation-timing-function:cubic-bezier(0,0,0,1);
  }
  100% {
  }
}
5. Understanding the possible changing variables -
When designing animation for interaction, it’s important to consider that variables do change based on user input. The most common variable that requires flexibility is the animation-duration() - this is the amount of time that the animation takes to complete.
The way I prototype this in After Effects is by expanding or contracting a group of keyframes. This can be done by selecting all the keyframes then holding Alt(Windows) or Option (Mac OS) and dragging the first or last keyframe to the desired time. This mimics the possible changing time variable within code.
My process for translating basic animations into code:
- Map out the keyframes in percentages.
- Insert property values into each percentage.
- Map out the easing curves between keyframes.
- Document the duration the animation takes.
- Done you have an coded animation!
Resources: